
Today in our category "Alterations IKEA" we will show practical enough hack that combines the use of two seemingly disparate series: a series of children's furniture SUNDVIK and system for storing Algot. As the name implies, we are modernizing Cots SUNDVIK, turning fixed bed in a mobile version on wheels. Let's get started ...
We need:
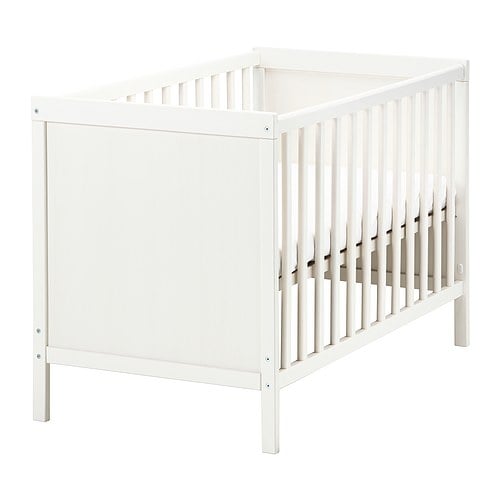
1. Bedspreads SUNDVIK - the bed is suitable for children from birth to 3-x years
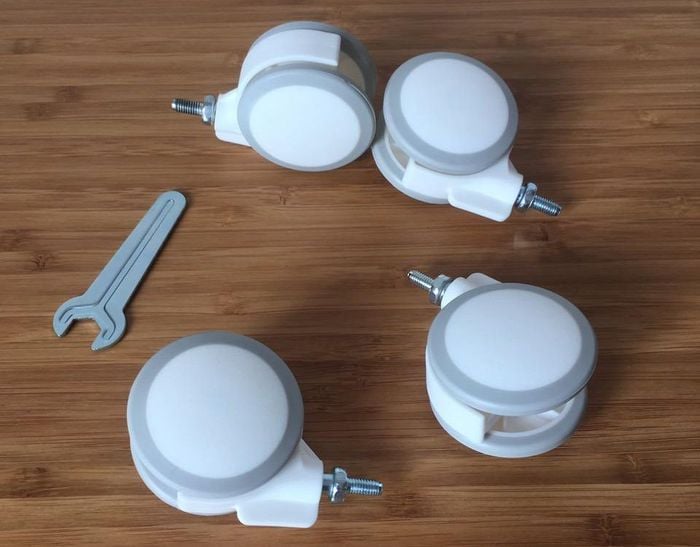
2. Set Algot wheels - in the set there are still fixtures for the ALGOT system. We do not need them.
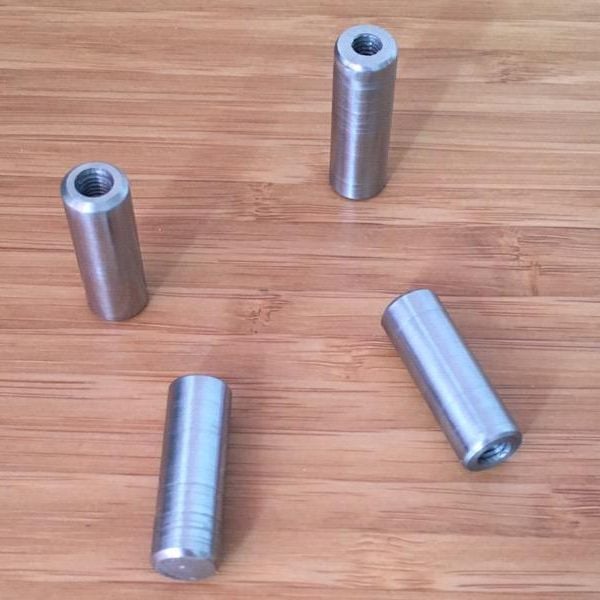
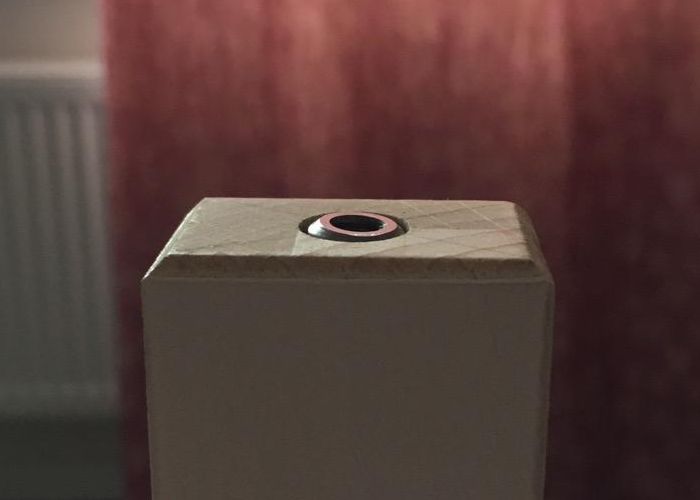
3. Metal cylinders with internal bore and threaded threads are perhaps the hardest part of this project. Threaded cylinders had to be ordered from the factory according to our dimensions. The ALGOT wheel was used as a sample for threading. If you have all the necessary tools, you can make these cylinders yourself. We adhered to the following dimensions: cylinder diameter - 10 mm, cylinder height 30 mm (you can make it higher, this will give additional strength to the whole structure, it is better not to do less), the depth of the internal threaded hole - 15 mm (do not make the hole depth less than 10 mm - it may be difficult to thread and install wheels).
Of the tools we need:
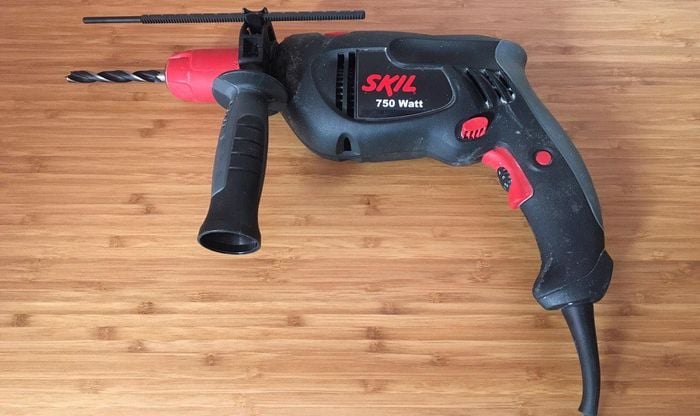
1. drill with a drill on wood - since the diameter of our cylinders 10 millimeters, you, we used the appropriate diameter drill bit.
2. pencil, ruler, glue for wood and metal - there is really nothing to add here :)
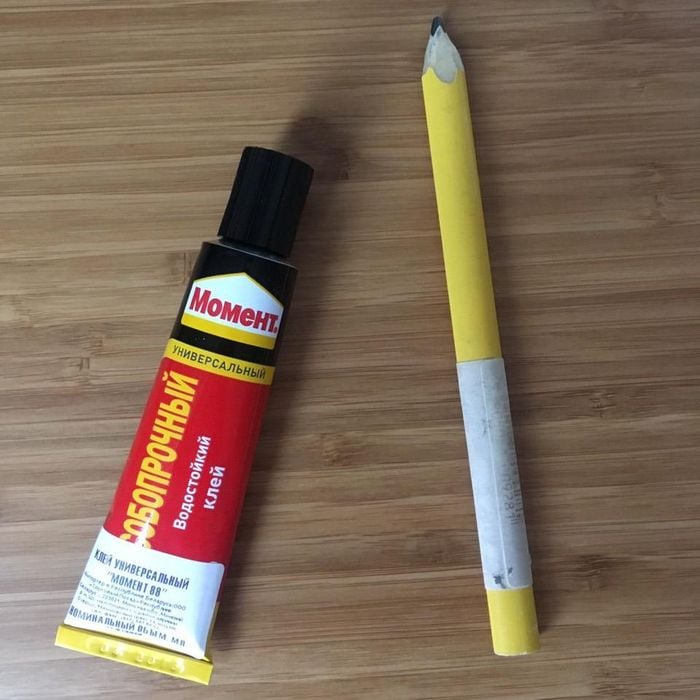
3. possibly a hammer - a lot depends on your drilling skills and dexterity. If you have not guessed with a diameter of metallic cylinders and diametrm holes in the leg, then either have to gently hammer the cylinders into the holes with a hammer, or they will hang out in the hole. Then you need to try to further secure the cylinders in the hole with the help of available items (eg duct tape) to reduce nagruzkku to adhesive bonding.
And now a photo-instruction phase of our project, the DIY.
1. Use a pencil and a ruler mark up the legs of the crib.
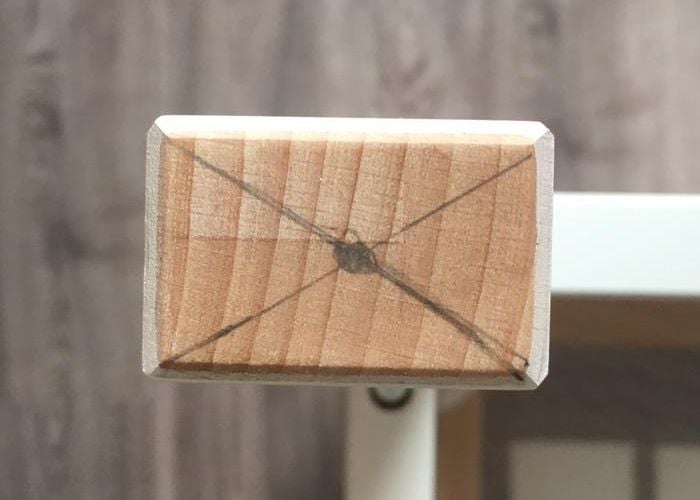
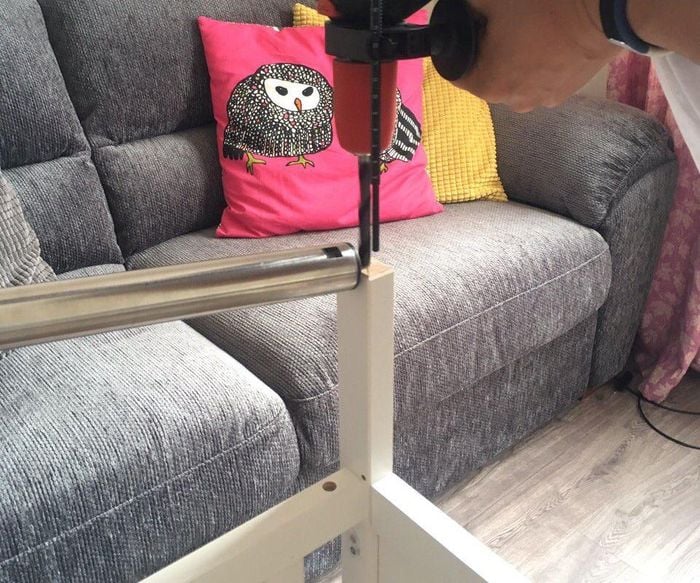
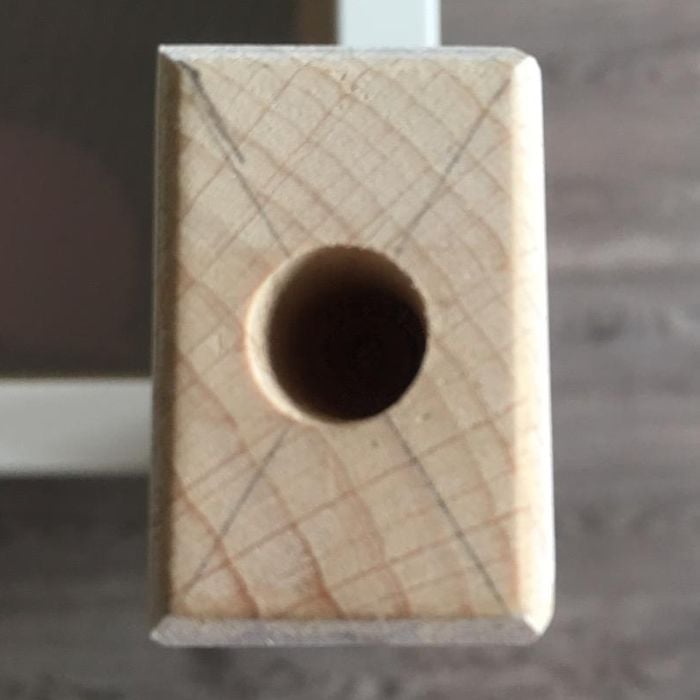
2. Drilling - at this stage you can use a vacuum cleaner to reduce the amount of sawdust. Do not forget to use terminator on the drill, pre-putting it at the height of the cylinder. Recall that in our case 30 millimeters. The most crucial moment adaptations: not to be mistaken with the depth of the hole and do not deviate from the vertical line.
3. At the bottom of the prepared apertures of fill glue, glue and grease hole wall.
4. Install a metal cylinder into the prepared hole using a hammer, if necessary. Cylinder presses minute 10-15, to grab adhesive.
5. Gently, without force twirl wheel.
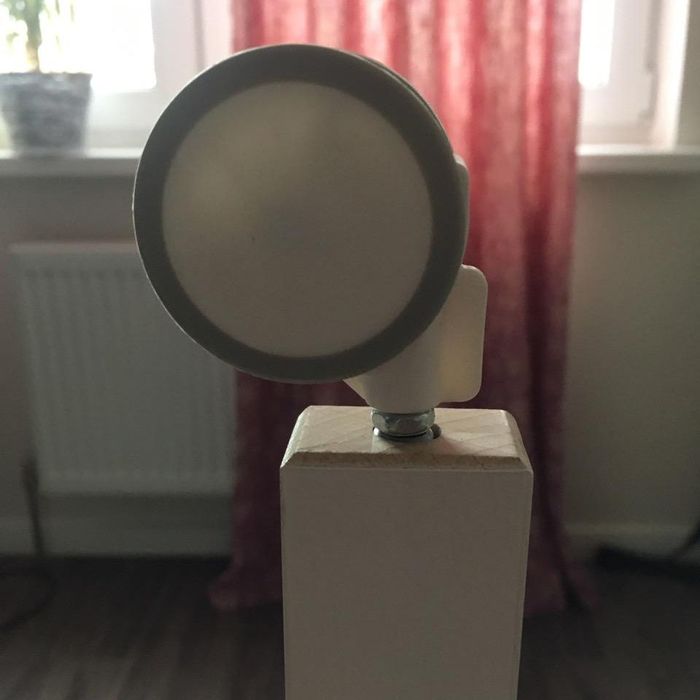
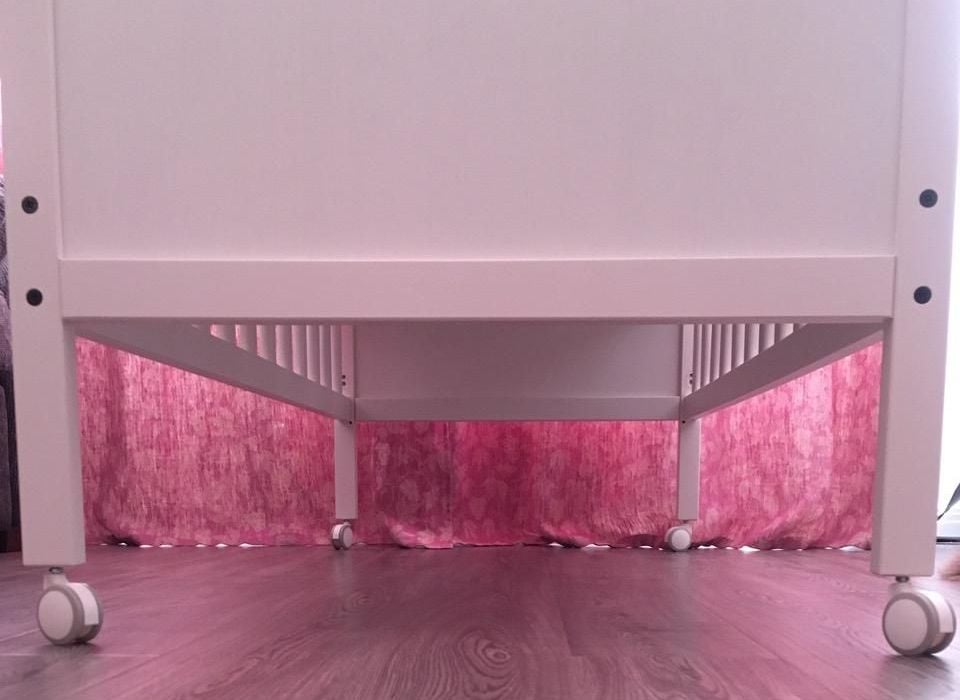
6. After setting all the wheels can turn the crib. 24 hours later you can pull your wheels. Cot on wheels ready.
Comments to rework:
- Cot on wheels is convenient for the newborn when the child grows up, it is advisable to remove them and replace them sticking pads under the base of the legs, so as not to spoil the floor. They can also be found in IKEA stores.
- For our project, we used a cot SUNDVIK, but can take any other bed, the main thing to calculate the diameter of the cylinder in relation to the thickness of the legs of the crib.
alteration Author: Dmitriy
PS: By the way, you can also share your DIY-projects for remaking IKEA furniture, sending them to our mail - [email protected]. We are happy to share them with our readers.


Novel
received a very cool)
I'm your fan !!!!
I want to subscribe to you
Paul
Dmitriy
Paul
Liu